Showing posts with label FreeTutorials. Show all posts

Tuesday, May 20, 2014

I Designed a Quilt!

Today's the big day.  I've written my first quilt tutorial and it's over at Sew, Mama, Sew!  It's called Ladder Lattice.  (Here's the link.)


The blocks are 12.5" and you can easily make three from a fat quarter so it's really up to you how big of a project you want to make.  Although I agonized over my photography skills -- I usually do -- I am totally pleased with the quilt and design itself.  I think it would look gorgeous in solids or just two colors too so I'll probably be making another one soon.

A couple of firsts on this project.  I didn't use any pins, just Elmer's washable school glue with a fine tip.  You squeeze a thin line inside the 1/4-inch seam allowance and touch press with the iron.  It holds everything perfectly through stitching so I hardly had any trimming to do which saved fabric loss.

The second new thing is my walking foot.  I finally ordered an easy-feed sewing foot for my freebie machine.  Now I'm invested!  Although my stitching actually suffered a little,  especially in-the-ditch; my speed really increased.  I know I'll be practicing more with it and making bigger quilts in the future.

It's really satisfying to see a project from my sketchbook come to life.  This one is so much like my pitch drawing that it's uncanny.  I designed it specifically to use fat quarters (7 prints) from Erin McMorris' Forest Hill by Free Spirit.

I'm still learning and growing as a quilter but the design part of it is a key element for me.  When I brainstormed ideas, this was one of five I pitched and then, as I constructed the quilt, I jotted down notes for two new projects.  I so hope that someone finds the tutorial useful as it would totally please me to see more quilts made from it.  Since I've really learned to sew through online tutorials, it means so much to me to give back to that process.

It's also the Blogger's Quilt Festival this week so I'm entering Ladder Lattice in the Original Design Quilts Category.  Just because I can and it feels so good.


This quilt leaves 10 inch squares (actually, a little more) for scraps so I'm working on a pattern that will use those next.  Please come back to check it out.

That's it for now.   Thanks for stopping by!


Keep stitchin'


-Kristin


Friday, February 7, 2014

Doll Quilt Swap

Finished up another terrific Flickr swap, the Doll Quilt Swap round #14.  The dresden is from a great free tutorial at Snips Snippets.  I recommend it!


I made a little house-shaped quilt inspired by this photo of the vaulted ceiling in my partners' awesome little sewing room.  She's Samantha, she's from British Columbia in Canada, and her blog is called Making Life Prettier.  The little cross-stitch on the label is on honor of the awesome quilt she made for the swap.


She's a pretty talented quilter; Fantastic Mr. Fox here stole a ton of hearts.  Boy was I surprised to find out those sneaky swap mama's of the DQS partnered us to each other.  This little fella (and some coveted extras: a zipper pouch and a fat quarter of Violet Craft) arrived in my mailbox last week.  It is my new, favorite-est thing.


It's totally the year of the fox at my house with this quilt, my Pillow Talk Swap pillow made by Kristine Holland, and the Monaluna Meadow fabric challenge for the Minneapolis Modern Quilt Guild.  (More about that in March when we do the BIG REVEAL!)


The only bad news is that I'm still waiting for the package I mailed out December 2nd to arrive at its destination in Sao Paulo, Brazil.  I know, I know...that's a long time!  I've never actually lost something forever in the post though so I hold out hope but that line is stretching thiiiiinnnnn. (Edited to add that it finally arrived in March!)

Whelp.  That's about it, folks.


Until next time.  Keep stitchin'!

Kristin


Friday, December 20, 2013

A Christmas Post

I saw a free embroidery pattern yesterday on the Wild Olive blog and immediately got down to stitching one up.


It's part of Mollie's "25 Crafts of Christmas." Adorable!  And it stitches up quick because it's so teeny.

(Find the pattern in this post.)


I don't know if any of you watch any Cartoon Network at your houses but I just love Adventure Time and this little, swaddled Christ-child kind of reminds me of Finn when he sleeps.


Speaking of Adventure Time, that reminds me of this quote by Cake the cat!


"Sweet babies!"

I'm a sucker for nativity sets.  More specifically, I can't resist rescuing orphaned saviors when I find them lost and alone among an incomplete crèche.  And while I don't want you to read too much into this, I do want to share my collection of baby Jesus figurines with you today.


Wait! Where are you going??


I'm amazed at the variety of little messiah repre-sentations out there...


Don't forget cookie cutter Jesus!


I'm not crazy.  Really.  They all live in an old Coca-Cola crate hanging on my wall.  But I am working my way up to one of those blow mold light-up ones someday...


Now I'm working on another project from Wild Olive (find the pattern post here.)


I cannot help myself.  They bring me joy!  And joy is what I wish for you this holiday season.


Merry Christmas and Happy New Year!


~Kristin


Adventure Time  ™ & © Cartoon Network 


Monday, September 16, 2013

My Favorite Sewing Tool

Invariably, from time to time, bloggers ask you to share your favorite notion or sewing tool.  I have a few -- but in the spirit of not repeating the most popular ones (my rotary cutter, its holder,  self-healing mat, thread snips, the miraculous sewing machine itself...) I usually share one that most people overlook or in-my-humble-opinion, under value. This time, in honor of National Sewing Month and under the tutelage of Sew, Mama, Sew! here is my favorite sewing tool.  Duh-dun-uhn-Dah!


Sure - there are so many pretty pin cushions out there to love.  I have collected, received, and even made a few.  I actually use them.


But nothing compares to my one-true-pincushion-love, the magnetic variety.

I'll admit, I was biased from the beginning because mom had one when I was little.  Hers is blue and round (like the Grabbit) and still working hard at her house next to the Pfaff she sewed my little girl clothes on.  It's got some heft and so it can double as a pattern weight.  When I started machine sewing almost two years years ago, I knew I wanted one like mom's.  Here's another pic of mine.

It's a Pin-Pal...and it's magic!

If you aren't among the devoted already, I'll tell you why it's a superior sewing helper.  It grabs your pins.  It holds your pins.  It finds your pins.

Let me explain its usefulness.

When you are sewing along your pinned seam, you can keep your full attention on what you are stitching because the magnetic pincushion will snatch/catch/grip/grab a pin tossed near its direction.  It even tells you it's made the connection with a little "chh" sound as it wrestles each errant pin home while you drive along.  I'm right handed, so I keep mine on the front right side of my machine.  It travels with me to the cutting table for pinning and back to the machine for unpinning while I sew.  That's the holding part.

When you do drop a small, sharp object (or your sewing machine needle breaks in spectacular fashion.)  And especially if you're like me and you most often sew in your bare feet...your magnetic pincushion is there to help you out of a dangerous situation.  Simply wave it around over the floor in the suspected vicinity of impact and it'll tell you with its happy little "chh" when it finds it.

Piece of mind, people.  That's priceless.


For travel, I bought a second one.  The Clover brand has a snap lid so my pins won't get into any trouble while packed away.  It also has a nice indentation for your fingers to help you pick up every last pin easily.  This actually comes in really handy for needles because they lay so flat and usually find their way to the bottom of the stack.


All magnets are not equal, however.  I really like the concept of The Needle Nest but it's power of attraction doesn't measure up.  I loved it while I was finishing each set of loose threads as I started and stopped machine quilting but when it got knocked off the table open -- by a bad kitty -- my needles didn't stay put.

If plastic is simply not your thing, you can make a more aesthetically pleasing variety out of a saucer, footed ceramic bowl, or wide shallow teacup.  I saw this idea on Amy Smart's blog, Diary of a Quilter, and there are plenty of neat-oh examples in a Pinterest search.  You glue a neodymium (powerful button) magnet to the bottom and viola! Of course, this one wouldn't make the "chh", it might be more of a "dnk" but you get the idea.

That's it. It's my fave and now you all know it.


Happy pinning.

              Kristin


P.S.  If you are Googling "Pin-Pal" with absolutely no luck, so was I.  I think my beloved model isn't made anymore even though I bought it less than two years ago.  The bottom says, "PinPal ©1986 BFP, Inc. Pat. Pend. Made in the USA." 
Besides the Grabbit and the Clover I mentioned above, another comparable item is the Dritz Magnetic Pin Caddy.

Thursday, June 6, 2013

Hexagami Handiwork

The Minneapolis Modern Quilt Guild's current challenge is hand work (MMQG Take it with You.)  Besides embroidery and finishing projects -- stitching up stuffing holes and quilt binding backs -- I don't usually tote around my needlebook and thread but I think I'm up for it.


On Saturday a few of us got together for a Sew-B-Q (a sewing barbeque! Get it?)   Lisa of Pixie Spit played an excellent hostess and we had a lot of fun stitching in the sunshine, getting to know each other, and learning to spray baste with 505 (it's a miracle!)
iHeart Cutebots! and Kaffe Flame Stitch
Then as it got cloudy, we piled into her studio's beautiful stash lair to touch everything!  It was awesome.  She has great taste; she literally doesn't have a single bolt, bundle, or ribbon I don't covet...and that has never happened to me in a LQS. (Take a look at her Etsy shop, Fresh Stash, to see what I mean.)

I did not come home with the Heather Ross -gasp!- but I did pick up a nifty half-yard bundle of Rashida Coleman-Hale's iHeart linen blend and Kaffe Fassett ribbon. (Did you know his name rhymes with "safe assett"?)

Anywho, back to the Q.

Each member received a neat little package of notions from the guild, including punch-cut hexagons in three sizes for English paper piecing, fancy threads (Aurifil 50 weight cotton and Bottom Line 60 weight polyester),  Milliner needles (John James Gold'n Glide sizes 10 & 11), a washable glue stick, Clover Wonder Clips, and a mini charm pack to play with!

Neat-oh!

This alone makes joining a guild worthwhile because not only do we get free stuff, and support, and advice, and organization... but then we get to see what everyone makes with it (and there are geniuses in this group!)  The challenge reveal isn't until September but in between chewing cookies and sipping beer, I did sew up my very first hexies.  I went with the 3/4 inchers:

Cute, huh?

So I'll admit, since then, I've been working on other things such as the Zakka 2.0 sew along.

But I did get out my trusty sewing kit this morning for a little project I found at Quiltscapes.  The tutorial for Hexagami is here at Riley Blake Designs and the project is very easy; I made mine in about 20 minutes (it really takes less time but I had to pick out fabric, starch it, choose a button, find my hexagon template, etc., etc.)

I started with a 3.25 inch (one short edge) hexagon and it folded down to a 1.5 inch.  Then I added a pin to the back.  I've never tried a method like this but it was just as easy as folding a paper airplane and sewing a button.


If you pressed/starched/cut your hexies ahead of time, these would make a great "Take it with You" project for the summer.


Talk atcha later.

- Kristin

Friday, May 17, 2013

I'm Shipping up to Boston

So I've mentioned this quilting bee I'm a part of on Flickr... (if you don't know about it, look to the right on this very page for an image of Tom Selleck.)  Now, not my hive, but another hive in the bee is making sewn flags for Boston - a project headed up by the Vancouver Modern Quilt Guild.  I just love the idea of sending a little bit of quilty goodness their way after such a horrible thing happened and I love that a gal in my bee was selfless enough to suggest her blocks should go there and finally, as a member of a Minnesota Modern Quilt Guild - I thought I should represent - so I decided to make this:

My contribution (front and back)


First, I drew a boston terrier.  Hey, it's what popped into my head (that and also the Dropkick Murphys song I used to title this post.)  I've got these cats, see,  and no dog but I love dogs and though I know very little about them, boston terriers seem adorable and tough at the same time.  That's what I want for Boston - adorable and tough - so there you go.

Then I picked some cheery colors out of the scrap bin and for me, the cheeriest of colors is a nice, bright yellow.  (Back when I sold camping equipment for a living, I liked to relate to customers that winter and mountain tents are so often sun-hued as it's the color most likely to keep you from falling into depression when you're trapped inside it.)  But I digress.

I really like the way my pup turned out; I don't draw enough!  I was going to cut out the whites of her eyes too but thought she looked good this way.  It's raw-edge appliquéd with a hand-written label, heat-set on the back.

Only six by eight inches but I think it says what I want to say and that is:

"To Boston with Love from Minnesota."

& Chips


Here's a pic of the real colors - I just love filters!

Wednesday, April 24, 2013

Pretty Pins Tutorial and Claiming my blog with Bloglovin'


It's not difficult to create your own pretty straight pins.  They are fast, easy, and make thoughtful gifts.  Pincushions and needle books are fun for swaps but they are infinitely more attractive with some custom pins.

Here's how to do-it-yourself:

Step 1: Gather Materials

  • Straight pins.  
    • I like long, glass head, quilting pins but this is up to you.
  • Beads.  Go wild!
  • Adhesive.  
    • I use E-6000 (Found at many craft and hardware stores...and just good to have around the house.)
  • Toothpicks or other applicators.
  • Surface protection.  
    • I put down some paper to protect the work space and dispose of sticky toothpicks.
  • Drying "rack."  
    • Pincushion or a placemat/towel/small quilt hung over the back of a chair works too.

Step 2: Glue It

  • Apply a dab of adhesive to the base of the pin head.  
  • Slide on a bead and press into the glue for a few seconds. 
  • Repeat for a layered effect.


Step 3: Let if Dry
You can make a ton or just a few.

Enjoy!


As a housekeeping note, I'm claiming my blog with Bloglovin' today.  I use it to follow bloggers whose work I enjoy; it compiles new posts in an easy format so I can browse everyone I like at one time.  (It's a great way to spot trends in the blogosphere and keep up with sew alongs, giveaways, and news too.)


Here are just a few scenes from around here this week:

Panda's here to help me sew today.
Panda


Fat cat, sitting on the couch
Probie


What is it with Thursdays?

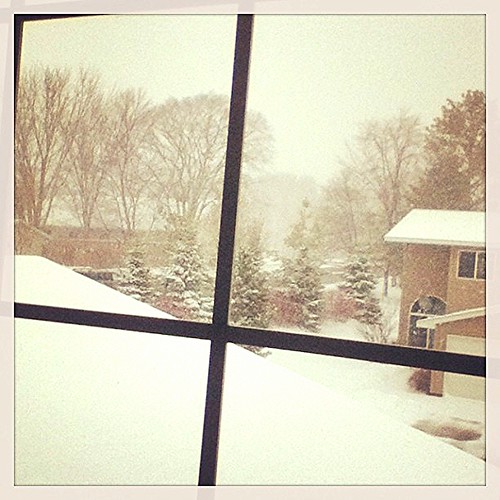
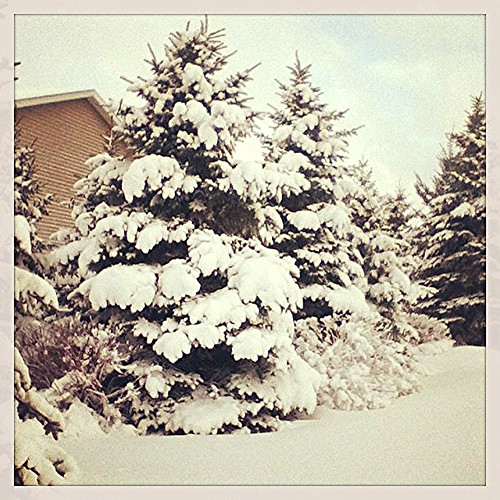
Happy Spring from Minnesota!

Sticky snow! (perfect for snow forts, snowballs, snowmen...) wanna play?


Thanks for stopping by!
-Kristin
Monday, March 18, 2013

Builder's Grade


If you're one of those people (and I'm beginning to think that means EVERYONE) who hates honey-oak trim, beige carpet and white walls - well - you're not going to like it at my house.  But to me, it's a gallery space with warmth and a place where every color looks just right.

See more from my photo shoot over at the MMQG blog where I posted this week about hanging and displaying quilts.

If you're sticking around to admire that purse in the photo, however, welcome!  I got it in the Minneapolis Modern Quilt Guild's bag swap at our February meeting.  A talented gal named Rozina made it and I couldn't love it more.  I immediately dumped the contents of my purse into it, threw it over my shoulder and haven't looked back.

Here's the one I made:


It's from the Tohoku Tote pattern/tutorial by Cheri at her "I am Momma, Hear me Roar"blog.


I followed the pattern except for adding this internal zipper pocket.  I found this tutorial helpful.


The prints are from IKEA; the black is duck cloth from JoAnn Fabric but I didn't like the way it faded when I ironed it.  All in all a fun swap.  We're doing name tags next.  Stay tuned!


Monday, December 3, 2012

Ewoks

My sewing room has become a tiny new friend factory and  here are the latest results:


I used a free tutorial from Wild Olive that I pinned a long time ago.  I did tweak it a bit by adding 1/4" seam allowance and turning it right side out after sewing.  They remind me a little of Hello Kitty -- darn cute.

Ahem.  As I get up to address you from my soap box:

I grew up in the 80s and the original three Star Wars movies were a big influence on me.  In high school, I worked at a video store (remember when we had those??) and that was when George Lucas remastered episodes IV-VI...and changed all sorts of things that made me wrinkle my nose with disgust.  Especially the "Jub-Jub" song at the end of Return of the Jedi.  It was so good before; why mess with success, George?  Why?

Anywho.  Ewoks still bring me joy but these guys are new so I'll have to dig out an old, dusty VHS cassette and teach them the original song.  School's out!

P.S. Did you know Kevin Smith and Quentin Tarantino were video store clerks in the 1990s too?  More on that later.

Thursday, August 2, 2012

Another Cradle Update

Well, it's been a while since I've posted about this one.  Remember the doll cradle I found on the curb in April?  (I blogged about making the mattress and pillow here and then the quilt here.)  Now there's finally a sheet and pillowcase for it.

A Mattress and Pillow

A Sheet and Pillowcase

I did consult a tutorial for making a fitted crib sheet.  I preferred this one because of the French seams then I just scaled it down to fit 12 by 22 inches.  The pillowcase is my favorite part.  I'm beginning to think piping can make anything more adorable.  However, I have to admit, the mattress is just so cute I hated to cover it up. 


A Quilt and Blanket

Here's the complete set.  Of course, some little doll or animal needs to start sleeping in here but at least it's ready for when inspiration strikes.  Or perhaps I'm simply prepared in case a tiny refugee happens by looking for a warm, safe place to overnight...  

These have to be some of the most enjoyable sewing projects I've ever made.  I'm totally one of those people attracted to anything miniature; it just makes me smile. 


On the hoarding front: I'm really hoping to find another doll bed to rehab.

Wednesday, June 27, 2012

Toot-Toot-Tutorial

Rollin' Out!  This Blanket Roll Up brought to you by Hustle, my scooter friend.

Well, it's happened.  I designed a project and turned it in to Sew,Mama,Sew! for all the world to see.  The Blanket Roll Up is my offering for the Ready, Set, Go! series this month.  It was actually my suggestion on facebook for the travel theme.  Because of that and because SMS has been such an influence on me this year, I'm so glad I get to participate although I'm embarrassed at my utter lack of tutorial/photographic timing/even sewing skills.  I think it shows that I was pressed for time and didn't allow for a dress rehearsal.

Still, I'm glad I made something real out of my sketchbook.  I actually genuinely like it and think it will be useful.  Even if no one else makes one (but I secretly really, really hope they do!) I will still probably churn out a few more of these babies myself because I think they make perfect accompaniments for travel fun. 

Just think, a baby shower quilt in a matching little roll with a toy or baby supply surprise wrapped up inside?  Or a really thick, luxurious towel with a good book and some sunscreen just waiting for the perfect beach spot?  Or a present for an adventurous kid?  Am I selling it?  I hope so.  If you do make one, I hope you'll come back here to comment and share the glory that is the blanket roll.


Ready, Set, Go!  Can you see my Blanket Roll Up?

Wednesday, April 25, 2012

Projects Little and Big.

 Today I put together this little lunch bag from Pink Penguin's tutorial.  I have admired it on Pinterest and on several blogs...so I knew I had to try it.  I've noticed I seem to put yellow into everything I sew now.
Since I talked my mom into joining the Minneapolis Modern Quilt Guild, I thought I better make a quilt fast so they don't know I'm such a poser.  These are granny square blocks from a tutorial here using a Moda charm pack of "Fairy Tale Friends" by American Jane. They are full of flaws but I love them more every day.